There are multiple methods for deploying whole-disk encryptions are used at Columbia University Irving Medical Center. Below are the most two common operating systems methods.
If you have any questions or use other operating system and having trouble with encryption, please contact Kang Chen kc2708@cumc.columbia.edu
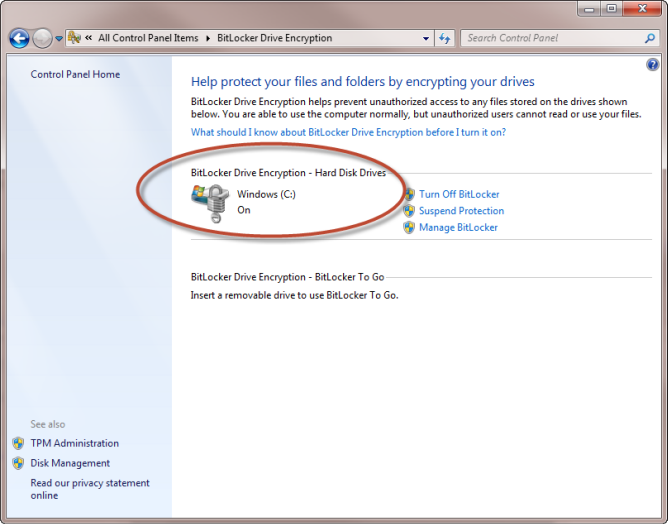
If you find your drive is not encrypted. Please check the instruction URL below for encryption instruction:
Windows: https://support.microsoft.com/en-us/windows/turn-on-device-encryption-0c453637-bc88-5f74-5105-741561aae838
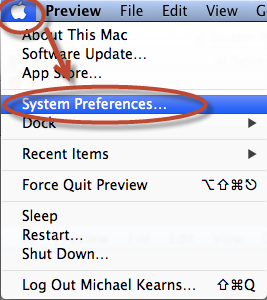
MacOSX: https://support.apple.com/en-us/HT204837
If the device will be used by multiple users in the future. Please select “Create a recovery key and do not use my iCloud account” when turning on encryption.
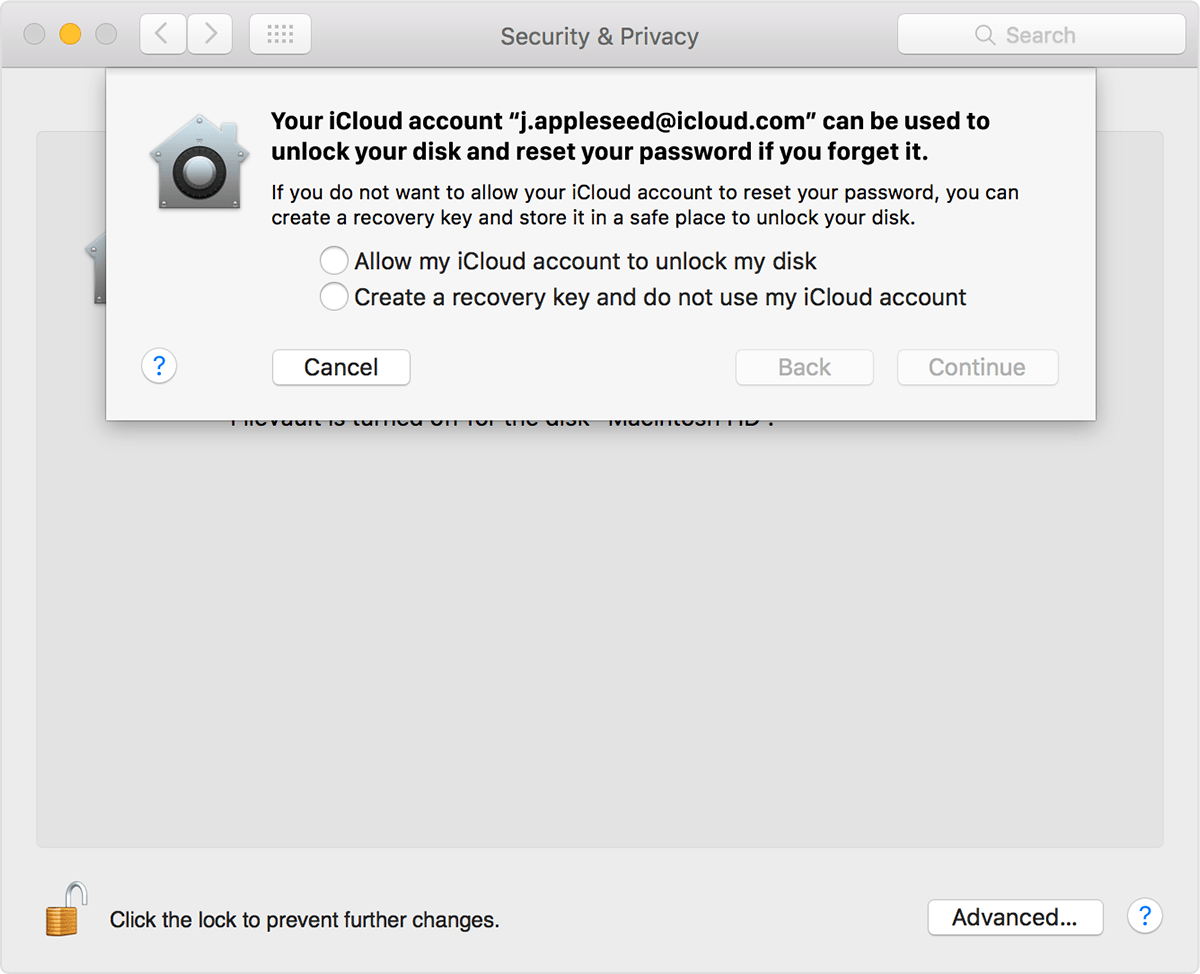

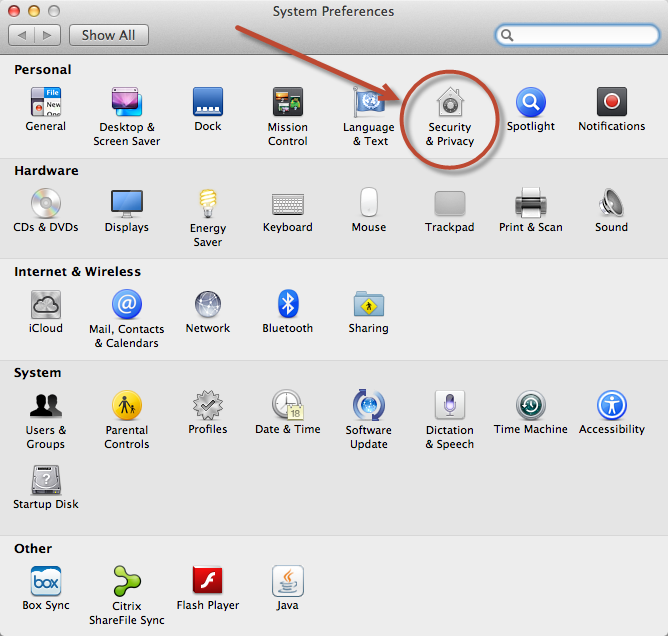

3. Click on “FileVault” tab. If the drive is already encrypted, the message will show “FilaVault is turned on for the disk “xxxxxx”.
4. Take a screen shot by:
a. Press and hold these three keys together: Shift, Command, and 4.
b. Drag the crosshair ![]() to select the area of the screen to capture. To move the selection, press and hold Space bar while dragging. To cancel taking the screenshot, press the Esc (Escape) key.
to select the area of the screen to capture. To move the selection, press and hold Space bar while dragging. To cancel taking the screenshot, press the Esc (Escape) key.
5. Upload the screenshot file as proof.